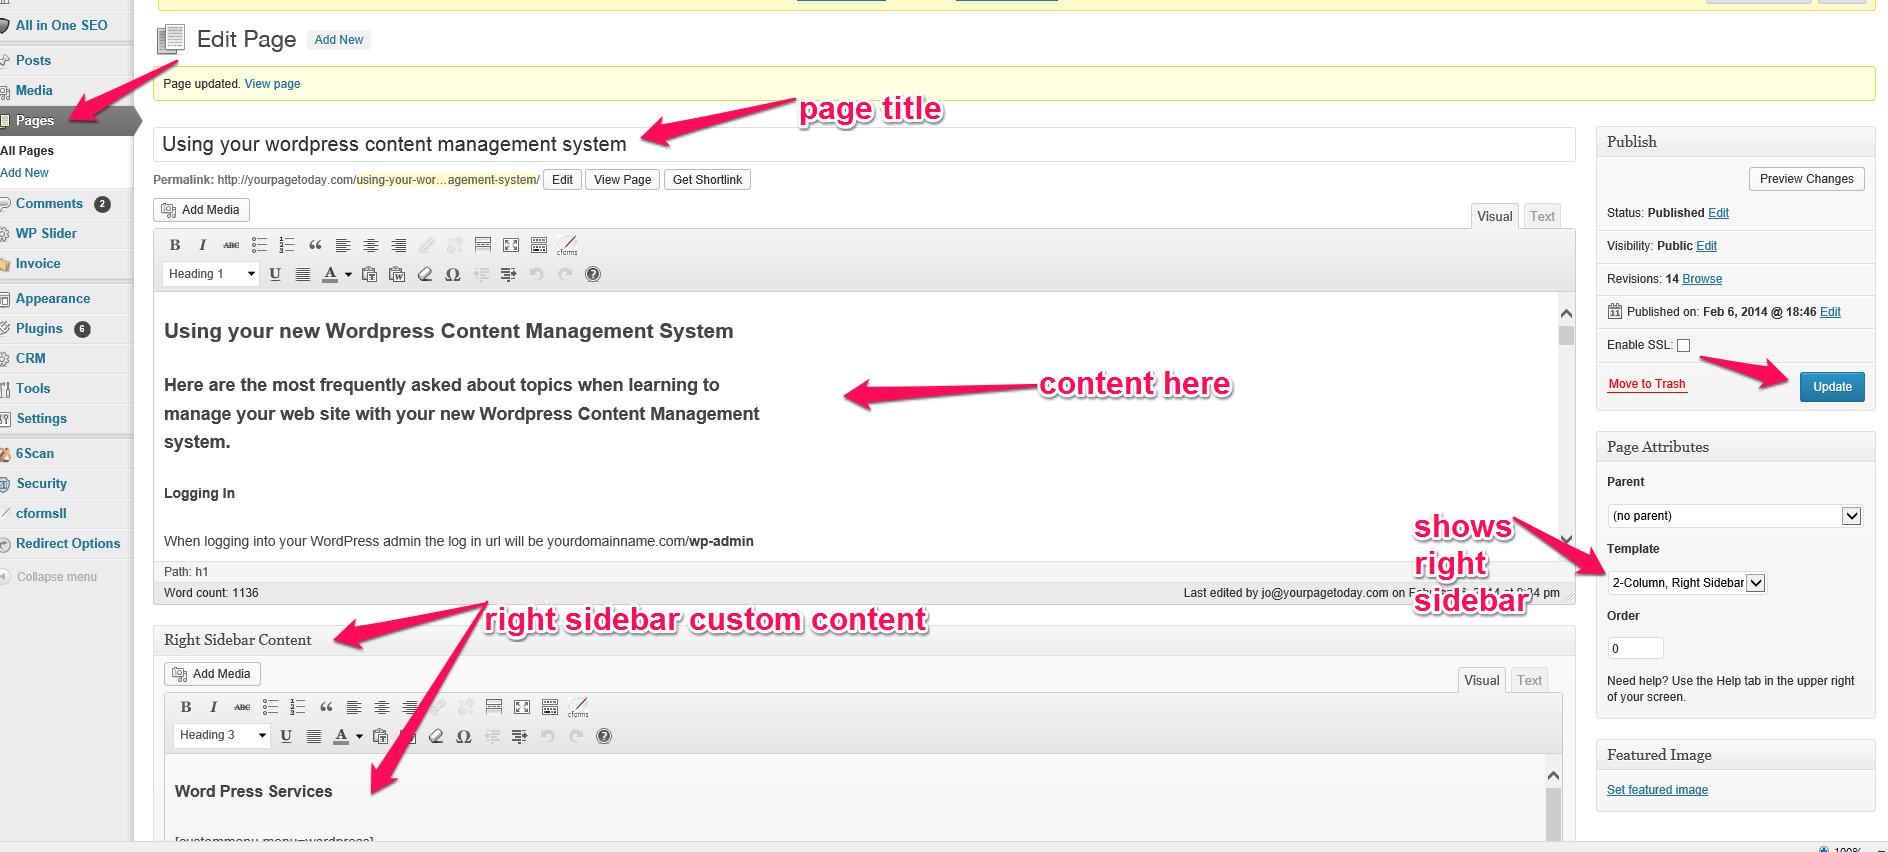
Using Your WordPress Content Management System
Here are the most frequently asked about topics when learning to manage your web site with your new WordPress Content Management system.
Tips: If you forgot your username or password there is a link right there on the log in page to retrieve it. After logging in, as an administrator when browsing through your web site, you will see a black admin bar at the top of your screen, this gives you quick access into quickly being able to choose edit from any page of the site.
Looking over to your left you will see a list of links, the most common ones that you will use are:
- Posts: this is where you add and edit blog posts for your blog page
- Media: you can add images and documents like .psf’s here to use later in your pages and posts
- Pages: this is where you add and edit your web site pages
- Appearance > menus: this is where you control the appearance of your main navigation links and footer links
- Appearance > widgets: typically here you can control your global sidebar content and blog sidebar content (most web sites that we create will have the option within your page when editing a page to add custom sidebar content and either show or hide the global sidebar)
Do you see this when you log into your CMS?? WordPress 3.8.1 is available! Please update now.
Don’t do it yourself …Often times if you have a custom design or development customizations, preforming an upgrade/ or update to your cms can break things like your overall site layout! Without a proper back up attempting an upgrade can be devastating. Learn More »
Follow these steps to create your new page:
- Give your page a title
- Add your page content and images if you wish
- Select your layout (from the right panel you will see page template, most sites willl have 1,2 or full page layout.
- Most sites will use featured image for a unique page banner
- Then save your page and its ready to use
(click on the image below for a larger view)
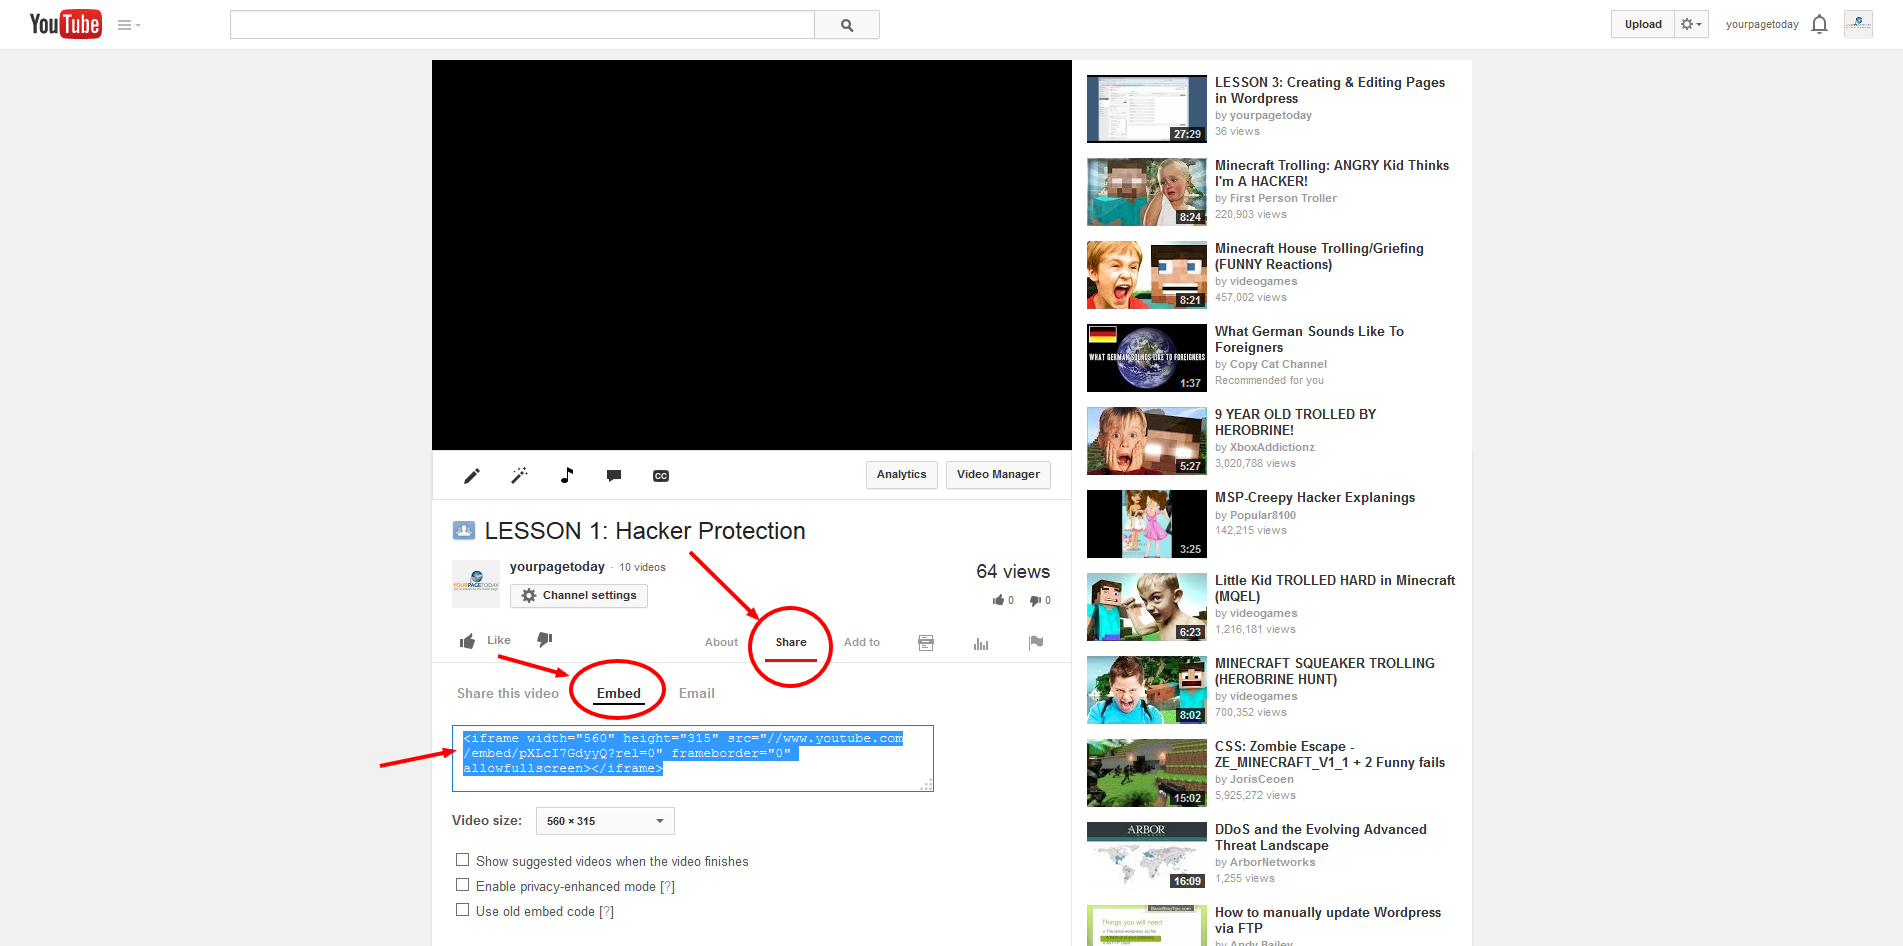
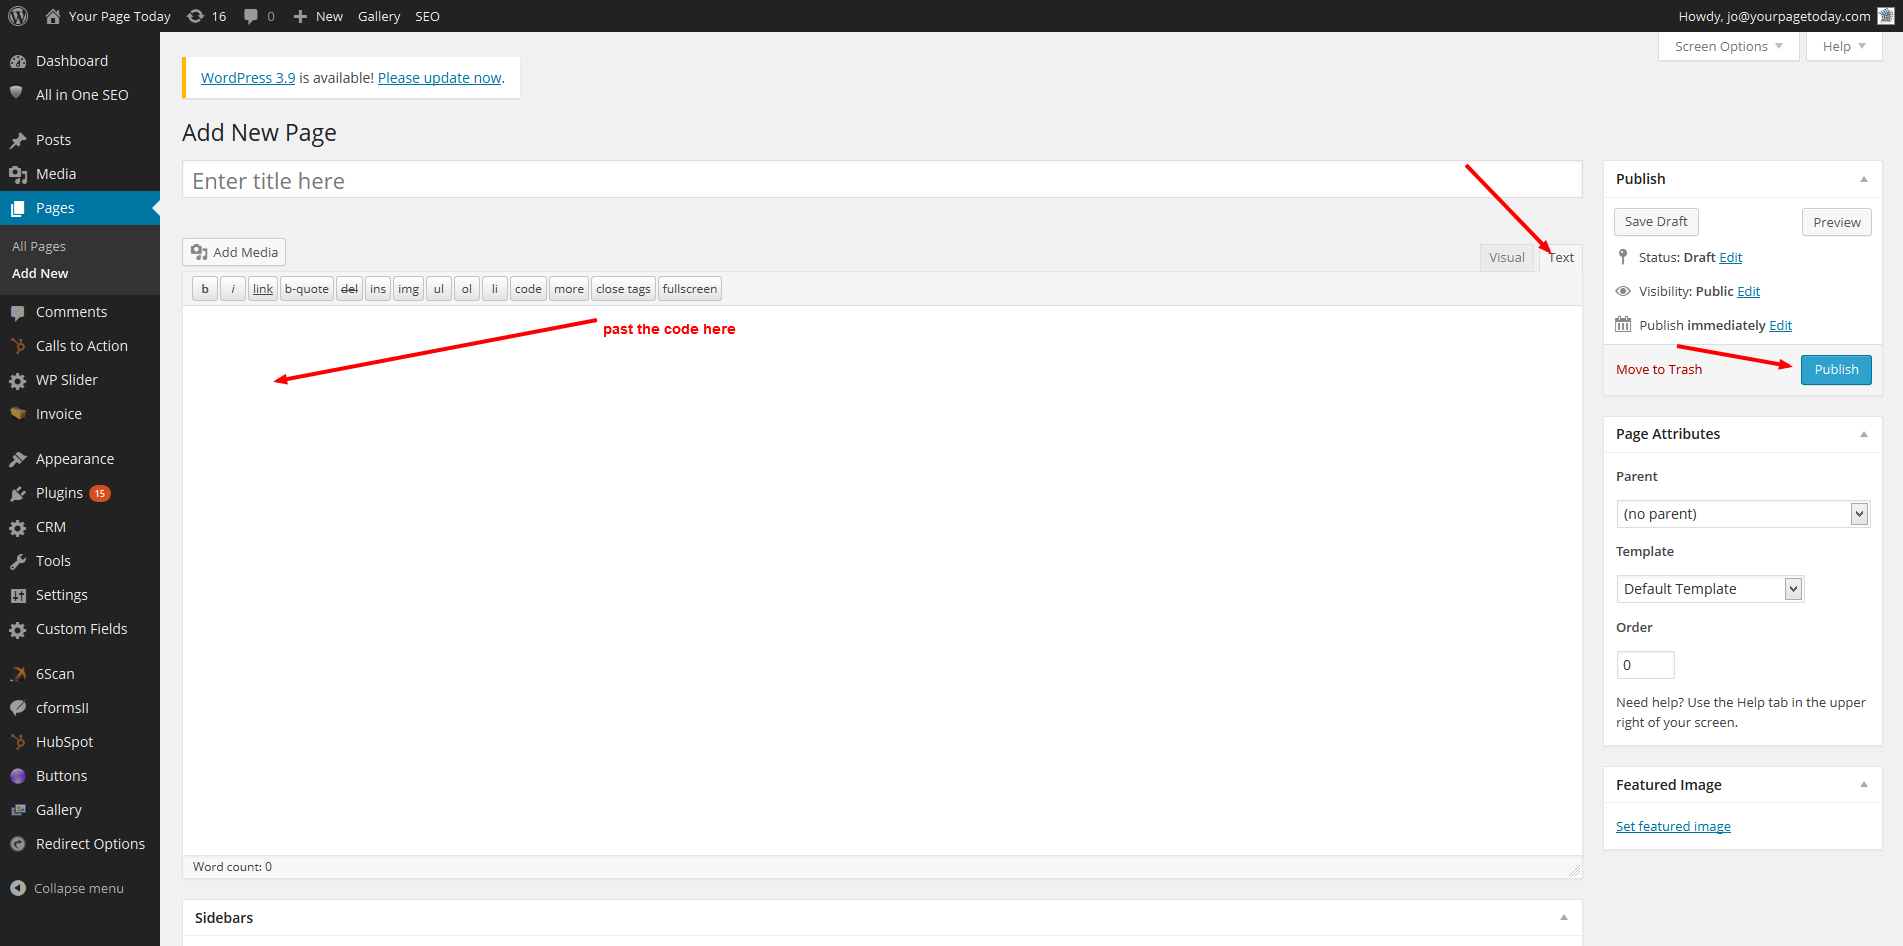
To add the code onto a page you have to first log into your web site as an administrator, then follow these steps:
1. Go to Your Tube to the video you want to add to your page and click chare under the video, then choose embed then copy the code out. As shown below.
(Click image for a larger view)
2. Then in your web site admin, choose the page you wish to add the video to and choose edit page.
3. Then switch the view to “Text” to paste the code into the html of the page as shown below.
(Click image for a larger view)
Then just save the page (choose publish for a new page, save if adding to an existing one) and whalla, the video is there.
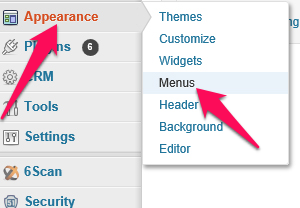 After you have created your site pages, you can add them to your main navigation bar by going to appearance and menus. Here you can drag and drop links to reorder them, you can add new links to the menu and remove them as well.
To add a new link to your menu, (see pink arrows just below to the left) choose the link page link you want to add from the left panel by checking the box next to the link, then choose add to menu.
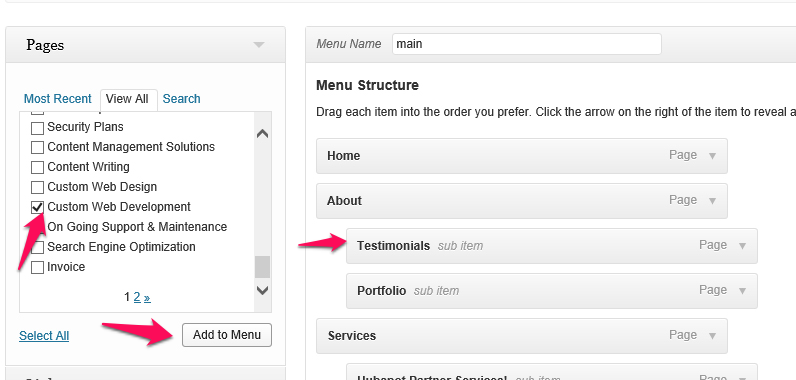
If you arrange a link indented (see pink arrow just above to the right) under another link it will become a sub page and fly out as a sub link.
To remove a link choose the arrow to the right of the link (next to the work page) to expand open the link properties and choose remove. After making all of your changes make sure to you save the menu for the changes to take effect.
The meta title is considered to be the most important keyword phrase for that particular page … think of this when adding the meta title …would your ideal target audience enter this as a search term in Google to find your services, IF they don’t know your company name? Each page should have a unique page title.
The description is a couple sentences introducing what the page is about and should entice them to click in to view the page.
The keyword meta tag is not as importnat as the title meta tag in terms of important keywords, its ok to enter them but remember that Google will look at the title as being the most important key phrase for the page. Click here to learn more about optimizing pages
You can also add categories that will appear in the side bar of your blog pages, this does a couple things, it adds keywords, and makes for easy user navigation as well.
You optimize the posts the same way as you optimize your pages. You can choose to publish your post, save it as a draft, in case you want to come back to it and finish up later (this will prevent it from going live but will save it within your admin under posts as a draft) and you can also choose a publication date, this comes in handy if you create for instance 5 posts and you want to schedule them to go live one at a time say once a week, and finally you can use featured image in posts to add your blog post images.